

Performance Photography Pt. II
This second part of the Mission Impossible: Performance Photography article will deal with the challenges we face and how to best use our equipment to conquer them.
Equipment
What’s are the three most important pieces of equipment for available light, performance photography? Fast glass. Fast glass. And, more fast glass.
It’s that easy. In low or changing light, it’s best to use fast glass. Both Alan and Scott try to shoot lenses no slower than F/2.8. Each carries at least one lens in the F/1.4-1.8 range. So do I.
Why? Because we face a dilemma when shooting in low light. We want to get a proper exposure without running the risk of capturing a lot of noise. Although there have been great improvements in the ability of our chips to capture data in low light while limiting the amount of noise, the general rule of thumb — the higher the ISO the more noise, generally proves true.
Here’s the challenge: the three variables that control the amount of light to reach our sensor are: ISO, Aperture, and Shutter Speed. Because we are shooting hand held, often with long lenses and subjects that move, most of us want to shoot higher shutter speeds; Scott and Alan often shoot at 1/250. For sports and color guard performances (where they toss flags, rifles and sabers), I often start at 1/500. These faster shutter speeds are a must.
And, to avoid noise, with even the best cameras, most people want to shoot at ISO 1600, or less (although with the newer cameras, people are getting good results at ISO 6400).
So, starting with a fast shutter speed, and constrained by the ISO, the best way to avoid noise and get more light to the sensor is with a fast lens. An aperture of F/2.8 lets four times more light reach the sensor than an aperture of F/5.6. Assume for the moment that we can get a proper exposure at 1/250, F/2.8, ISO 800. To get that same exposure using a lens at F/5.6, we would have to bump the ISO to 3200. That’s a huge difference — one that with many sensors will introduce serious noise.
Zoom lenses play an important role. I wasn’t surprised to find that Scott and Alan, both Nikon shooters as am I, carry the same lenses I take to most performance shoots, the 24-70 F/2.8, and the 70-200 F/2.8. In addition, we usually carry a faster prime lens — I carry the 50 F/1.8 which is an incredible bargain and can be purchased for less than $150. Sometimes, to capture something different, I carry my 16mm FishEye which is also a F/2.8.
Why the zooms? Because, when we are stuck in one place and cannot move to or from our subjects we rely on the zoom lenses to frame our images. In the studio or in a space I control, I choose where on the lens I want to be, and walk to and from my subject to frame it. That does not work during performance photography. Zooms are helpful.
But, fast zoom glass, though nice, is not essential. The best camera and lenses to use are the cameras and lenses you own. Some of my best shots were made with my Canon G11 point and shoot; in fact, it’s so good that I sometimes carry it as a back-up instead of my Nikon D2x. Want to shoot performances? Do it. Don’t let your perceived lack of equipment discourage you.
And, fortunately, there are post-production/processing work arounds for equipment imposed limitations. For example, there is some excellent noise reduction software that is quite effective; I use both Imagenomic’s Noiseware and NIK’s Dfine.
Another technique I share with Scott and Alan is to “take advantage” of noise by converting to black and white. Voila! The noise becomes “grain” and gives the image a nostalgic, old world “film look”. There are a lot of great ways to convert to black and white. My favorite is Silver Efex Pro 2.
What you carry in your bag will be defined by your style. Unlike Scott and Alan, I carry two meters, a Sekonic 758, and a Sekonic C500R Color Meter. I’ll talk about using both in a moment. The key is to travel light and self contained; everything should fit on our back or belt. Large, dark, crowded venues are not the place to leave unattended gear cases.
My favorite equipment tip from Alan? Carry ear plugs — lots of them — ear damage is an occupational risk for concert photographers. Why lots of them? Alan makes friends of his fellow photographers AND the security folks by passing them out. Hard not to like a guy who comes with “freebies”. (Actually, Alan and Scott are two of the most likeable guys I’ve met on the “photo teaching circuit”; both are self-effacing and unassuming. It’s hard not to like them and I think that goes a long way in their getting and maintaining access.)
The oddest thing I carry? Knee pads. Often, we have to stay low, on our knees, to stay out of the spectators’ line of sight. Do that for a few hours, or in the case of a tennis tournament for several days, and you will hurt. The pads may look dorky — but it’s hard to make a fashion statement draped in camera gear, anyway.
So much for what we carry — let’s talk about how we use it.
Step 1. Location Scout — Locking In On The Lighting
Failing to prepare is preparing to fail. — John Wooden
Be it in a studio or on location, we all share a common goal — to get a perfect exposure, one that captures what we are seeing with our eyes. It’s a lot easier to do in the studio where we can control all of the variables. It’s much more difficult to do on location where we cannot.
So, to close the preparation gap, when possible, I scout a location before a shoot. Be it a stadium, church, auditorium or club, I want to know as much about the lighting as I can — particularly the quantity, quality, location and color temperatures of the sources of light.
More often than not, these venues do not create lighting schemes for each performance. They tend to have preset lights in place that they modify in intensity and change with gels and some times diffusion. By switching lights on and off, they control which parts of the stage are lit. However, there are situations where there is no one “switching” between lights — and the lighting pattern at the start of the performance is the same pattern that exists for the entire performance. Or, the exact opposite may occur; the lights may be programmed to randomly change, in every way — intensity, quality, color and duration. In either situation, with a couple of steps a performer can move out of the light, completely, or the light can change so significantly that we must adjust our exposures or lose the shot.
My protocol is simple: I draw the location, put symbols to represent the lights — their location, type (including color temperature for white balance purposes) and intensity. I also note how the light sources are modified — be it by barn doors, gels or diffusion.
To check the quantity of the light, I use my light meter to take a series of readings — I walk across the stage, metering every couple of feet, marking my diagram to indicate every spot in which the light either increases or decreases by a full stop; if I cannot get onto the stage, I use the spot metering function of my Sekonic L-758 to grab my readings from a distance; the “spot meter” gives me a “reflective” as opposed to the preferred “incident” reading. (“Reflective” reads the light bouncing off the subject and is less accurate than an “incident” reading which reads the light before it hits the subject. The meters inside of our cameras take reflective readings. So, one might do a scout metering with the camera — but it is a lot more difficult to get precise, consistent readings that way.)
To assess the quality of the light, I look at the modifiers; diffusion will soften it, bare bulbs will throw hard light, the closer the light to the subject, the broader the shadow transition line. More often than not, there is little or no diffusion on the lights; and, the light placement is controlled with something like barn doors which stay constant throughout the performance.
The next thing I do is figure out the White Balance setting for the shoot. This is usually the greatest challenge. Many venues mix light sources — we find tungsten, halogen and fluorescent and daylight all in the same space. This is particularly true in churches and reception halls. There are a couple of things I do to minimize the risk of color cast.
I take a reading with my Sekonic C-500R. This is by far the best way to deal with the situation. The meter gives me a specific color temperature reading, in degrees Kelvin. I then set a “custom white balance” in my camera to that number. Perfect.
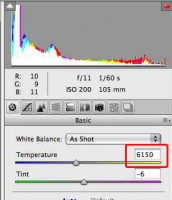
Uh, except for the great Photoshop Gotcha. We cannot assume that Photoshop recognizes the Kelvin temperature settings we use in our cameras — either those that use a preset or those that use “custom” readings. For Nikon shooters, there appears to be a discrepancy at every setting. Nikon’s “Flash” setting is 5400K. When I use Photoshop, it opens those images in the 6000K range. It’s not a big deal; I simply batch correct all of the images to 5400; but if you don’t know to do that, you will have a color cast when none should exist. (As one might expect, Nikon’s own Capture NX2 reads the files, perfectly, and opens the images to the exact Kelvin setting used.)
If I can’t get a meter reading, I try to take a reference shot using a Gray Card or an X-Rite Color Checker Passport. This gives me an accurate starting point for post production. (And, when I can’t do that, either, in post production I’ll use teeth or the whites of eyes to set the WB point.)
OK, I’m a bit anal. I over prepare which may be especially foolish because I cannot control ANY of the variables I’m researching. But, it gives me confidence and, when necessary, helps me make informed guesses.
Stadiums and gyms add another wrinkle.
When shooting sports, outdoors, in the early fall, we usually start in daylight and then must make the transition to artificial light when the sun goes down. For a time during the transition, we are in a mixed lighting situation — and, as the light changes, we have to adjust our settings accordingly.
Indoors, I’ve been running into some odd, off the chart lights — like those I found in a new, beautiful, high school gym in Bryant, Texas. Looking up at them, one would swear that they were tungsten bulbs. But, they were not. And, that became clear when I looked at images shot in “bursts”; adjoining images had different color casts. When the camera was set at “tungsten”, none looked good. So, out came the C-500R. I got a series of readings, all around 4150K. The set my D3 to 4170 for the shoot, which was the closest I could come. And, I shot bursts — figuring that some in each sequence would be right. It proved to be a good move. When I got home, I did some research on 4150K and found out that the lights were Xenon Arc’s — and that they “cycled” between two adjacent color temperatures at a very fast rate. With my custom setting, in post-production my starting point was close enough to make all of the images useful. Bottom Line: We cannot assume things are what they appear to be; there are all kinds of new, “green” lights out there and we’ll have to learn how to master them.
A. Virtual Scouting — We don’t always have the time or opportunity to do on site location research. Fortunately, there are great Internet resources to allow us to scout with our computers. One of my favorite online communities — The Texas Photo Forum — has a section in which lists gyms and playing fields and photographers set forth the type of lighting and conditions one can expect on a shoot. I’m sure similar resources exist elsewhere.
B. Thou Shalt Honor the Lighting Director’s Artistic Vision — In his Kelby Training session, Scott Diussa makes a very important point: Our job is to work to maximize the impact of the lighting director’s artistic vision. Our job is not to overpower or neutralize it. If the lighting scheme calls for a purple cast, our job is to get an exposure that best reflects that purple cast. Our job is not to neutralize it or replace it with a choice of our own — which we can easily do with camera settings or post-production.
(To me, it’s like a client taking one of my images into Photoshop and changing it. That may not bother some people, but it bothers me. That’s why I don’t “sell” my images, I “license” them; and, my licensing agreement makes clear that my images are not to be altered, in any way, without my written permission.)
At the end of the day, we are trying to get a perfect exposure. I find that I do a better job when I am well prepared, and scouting is a part of that preparation.
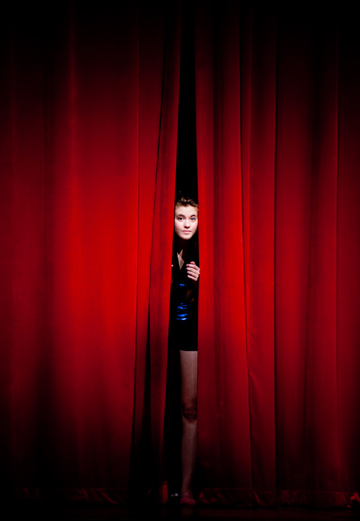
Perhaps, the most difficult venue I’ve photographed was the stage upon which Jenny’s Winter Guard gave its annual performance. There just was not enough light. And, what light existed lit only very few small portions of the stage. This was one of those times where a performer would go from light to dark in a couple of steps. To make matters worse, group shots were almost impossible because some of the group members were in the black hole while others were lit. Why was it like this? Because the lighting was set to maximize the performance, not my photography. The performers were tossing things into the air; they had to look up to catch them and did not want to be blinded by the lights. To the audience, it looked great. And, that’s what mattered. Me? I got enough shots to fill in their yearbook.
Some times, that’s the best we can do.
Step 2. Camera Settings
A. Shoot RAW
This seems to be a universal practice amongst all sports and performance shooters. RAW gives us the ability to use post-production to overcome the limitations discussed above.
B. Exposure Mode
There are many people who choose to shoot in one of the Priority Modes — Shutter Priority or Aperture Priority. By doing so, they use the computing power in the camera to try to get a perfect exposure.
In low light situations, in an attempt to maximize the light to the sensor, many shoot in Aperture Priority mode; they set the camera to the greatest aperture the lens affords and tell it “Never stray. Stay here, no matter what”. And, the camera will. The risk in this setting? To get a shot in very low light, the camera will have to go to a very slow shutter speed — one that cannot be successfully hand held — thereby resulting in movement and out of focus shots.
Scott, Alan and I shoot in Manual Mode. We choose our shutter speed and aperture; they remain constant until we change them; the responsibility is ours, not the camera’s.
Our starting settings are discussed above. Scott and Alan are so good at doing this that they can get their initial settings by instinct and experience. They will look at the situation, tweak the shutter and aperture settings, shoot a frame or two, and then tweak again to optimize the exposure.
I’m not that good. I start with a meter reading from my diagram.
In manual mode, when the lighting changes — either because a performer moves to a darker or brighter spot, or because the lights themselves change — we have to start twisting dials. To maintain proper exposure, we change either the shutter, the aperture, or both. With experienced shooters like Alan and Scott, this is fluid and seamless. It’s more difficult for me; I’m embarrassed to say that in the heat of the moment I’ve moved the wrong dial, or the right dial in the wrong direction; I am haunted by a series of flag performance images of Jenny, shot during a half time performance, that were so underexposed as to be unsalvageable, because I moved the aperture dial in the wrong direction.
There are a couple of “cheats” that help those of us who shoot in Manual Mode but are at risk of making mistakes.
First, even though we are in control of the camera, the internal meter continues to function. We can glance at it to make sure our settings are not too far off. To use it effectively, I set the camera to the “spot metering mode”; if I want to take a quick reading make sure to meter the face of the performer.
And, second, my favorite “cheat” — setting the camera to use manual settings while activating Auto ISO. As we’ve discussed, there are three variables we can use to get a perfect exposure — Shutter Speed, Aperture, and ISO. Most of the time, while shooting in manual, the ISO remains constant. We usually choose a value that gives us the greatest sensitivity while minimizing the risk of noise. Alan and Scott start with a very safe ISO in the 1600-2000 range. I do, too.
However, in situations where I’ve not scouted, or in situations when I know that the light intensity will vary beyond a range I can control with shutter and aperture adjustments, I’ll use Auto ISO. In essence, I tell the camera to internally adjust the ISO to get a proper exposure using my selected shutter and aperture settings. In some ways, this is a “priority mode”; the camera can take some control away from me. But, I see it as an Negative Priority Mode. I’m telling the camera, “I don’t care about ISO, do what you want, but leave my shutter and aperture alone.” In the Nikon, I can limit the camera’s discretion. I can tell it that it cannot adjust ISO above a chosen setting — for me usually 6400.
Using Auto ISO has risks. One must be diligent because, like pure manual mode, we have set limits and unless we adjust them, when exceeded, we will not get proper exposures. And, if we set the ISO range too high, we will be be capturing noise. But, I don’t worry about noise. My noise reduction software takes care of it.
C. White Balance
Although most shooters, like Alan, use Auto White Balance, I do not. I prefer to use a Custom setting, as discussed above; if I cannot get a custom reading, I use the Programmed setting that most closely matches the source; most often, that is a “tungsten” setting. In the newer cameras, Auto White Balance does a very good job. However, I do not use it because one of my favorite instructors, Jim DiVitale, taught me that it is easier and more effective to correct the white balance of a batch of images all shot at the same color temperature than it is to run a batch process when all of the images have been shot in Auto — at different temperatures. Auto works and it’s easy. I’m stubborn. I never use Auto.
D. Continuous Servo Auto Focus Mode — Spot or Dynamic
There is a lot of movement in performance photography. Our subjects rarely stand still. Therefore, most of us use the Continuous focus mode. Once we initiate the focus mechanism (either with the shutter button or a programmable button on the camera), when the subject moves, the camera follows it and tries to keep it in focus.
Depending on the amount of movement, we have to decide how big an area we want the camera to read in establishing focus. We can use a Spot, or a Dynamic area. If the subject is somewhat still, or does not move too erratically or far, spot works well. If there will be greater movement, we can use more focus points in what Nikon calls a “Dynamic Area”. Autofocus on modern cameras works so well that I don’t think the choice between spot or dynamic is critical in what we do.
E. Continuous Release Mode — Shooting Bursts
When I first started shooting sports, I had a film camera without an auto advance mechanism. I learned to shoot a camera the same way I learned to shoot a gun. One shot at a time. Aiming carefully, taking a deep breath, becoming still and at one with my tool of choice — making each shot count.
When I switched to my first digital camera, I retained my one-at-a-time shooting style. What a dolt. The failure to take advantage of the ability to shoot bursts, when appropriate, was just plain dumb. (And, a bit arrogant. I used to look down my nose at photographers who, at sporting events, were shooting bursts with so many frames that I thought they were shooting movies. My thought: if you can’t get it in frame with one frame, you don’t belong here. Arrogant. And, very wrong.)
Shooting bursts allows us to capture the nuance and subtlety that are the essence of an artistic performance. Things change in portions of a second and burst let us capture them.
For sports and color guard, I set my camera to shoot what Nikon calls “Continuous High Speed” (Ch on the dial) at 9 frames per second.
However, just because I can shoot 9fps, does not mean I use them all. I’m at my best when I use my film camera/gun training and use the trigger sparingly and carefully.
Final Thought: The most important thing to take on a performance shoot?
The answer is simple: Reasonable Expectations.
With so many variables beyond our control, it is unreasonable to expect that all or most of our frames will be keepers. They won’t be. And, we should not feel bad because of that.
The truth is that most of the great photographers I know throw a lot of images away. We see their work in magazines or winning contests and we assume that all of their images always turn out right. They don’t.
The key is to continually push ourselves to learn and get better — to increase our ratio of “keepers”. And, to never let unreal expectations take the fun out of what we do.
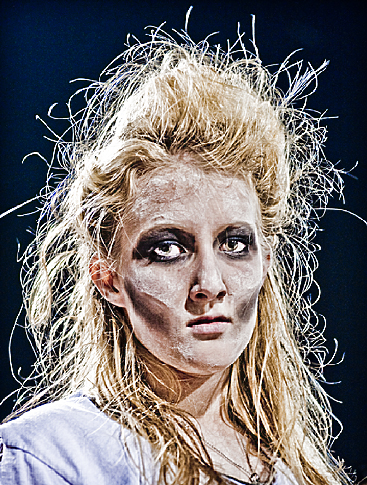
This image was shot under some terrible conditions — strong backlight and movement made finding a shooting angle difficult. But, it is the strong backlight that makes the image.Images on either side of this one were not useable. But, this one was and, on that night, that was good enough for me.
But Wait! There’s More!
Kelby Media Group has graciously given me permission to incorporate a portion of one of the segments from Alan and Scott’s Concert Photography course. I chose this sample because it represents a few of the things that make these guys such great teachers: (1) they are practical and to the point; (2) their images rock; and (3) they are really nice guys. I’ve watched these lessons a few times and have learned quite a bit from them. This is copyrighted material, to be used for personal use and not to be distributed in any way.
Note: Depending on the speed of your computer connection to the ‘net, you may want to allow a moment for the video to load before playing it; with slower connections, it will stop and “buffer” while streaming, only to start up again; I find this very frustrating and prefer to wait until I can see that at least a third has loaded before I Double Click the arrow button.
Thanks, Kelby Media for allowing me to show this.
Note: My screen shots are captured in IShowU HD Pro. I tried several programs that capture screen action and found that this was both easy to use and offered more bang for the buck. Although I have a YouTube channel, I don’t publish most of my videos. I make a lot of them to capture “odd” things I’m doing in post production so that if I later, if have a grey moment and can’t recall how I did something, I have a video that shows me each step. I’ll do a full review of iShowU, and explain more about why I got it, in an upcoming post.
(Copyright: PrairieFire Productions/Stephen J. Herzberg — 2011)







This is by far the most complete post on this topic on the web. Excellent!! The only thing I might add is “know your buffer”. If you are shooting raw and run your “motor drive” you can fill your buffer very quickly.. You can shoot 9 fps, but if your buffer will only hold 6 you may find your pressing the shutter release and nothing is happening. It’s an easy way to miss good shots. One way to compensate is to use fast storage media so the buffer will download quicker and get you back to shooting.
I also agree with limiting the range of your ISO. If you shoot a black background with dancers in light costumes, your camera may incorrectly meter on the vast expanse of black and drop your ISO as low as it will go. Suddenly the dancers are blown out beyond recovery.
Once again, excellent article!!
thank you so much! It is so hard to find good advice on shooting color guard, both in winterguard gym competitions, and stage performances. This is great!!