

Removing Unwanted Texture
I remember when my 18 year old, soon to leave for college, daughter, Jenny was a teeny tiny and needed her Daddy to do the simple things in life like feeding her, bathing her and changing her diapers. I remember thinking how cool it would be when she could feed herself and I’d get to eat my meal while it was warm.Then she started to grow up, become incredibly competent and self sufficient — and less in need of the things I could do for her. And, I started missing those “moments” that allowed me to spend time with her.
So, the other night, when I heard her call out “Daddy, I need your help”, I was thrilled to jump in. I was needed. How cool.
Jen, her band’s historian, was making an iMovie for the final concert containing pictures and videos of the past year. One section includes baby pictures of the graduating seniors. And, that’s where I came in.
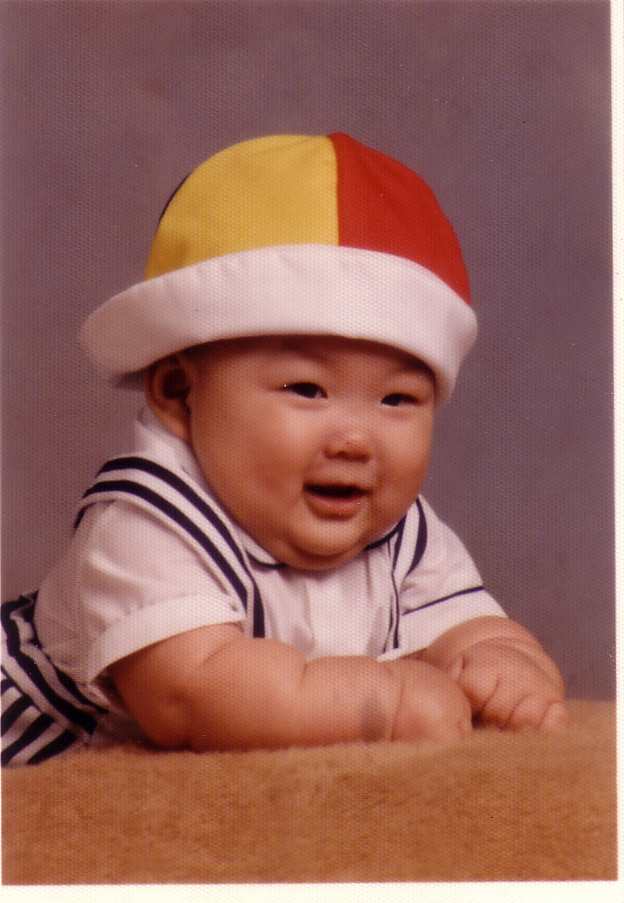
One of her close friends, Chirs, gave Jen a 2×3 picture his parents had taken and printed on highly textured paper. When Jen scanned it in, it looked like this — cute but, because the three dimensional texture lost its value in a one dimensional scan, it looked flawed. (In most browsers, if you click on the image below, it will get larger — and the texture will be even more obvious.
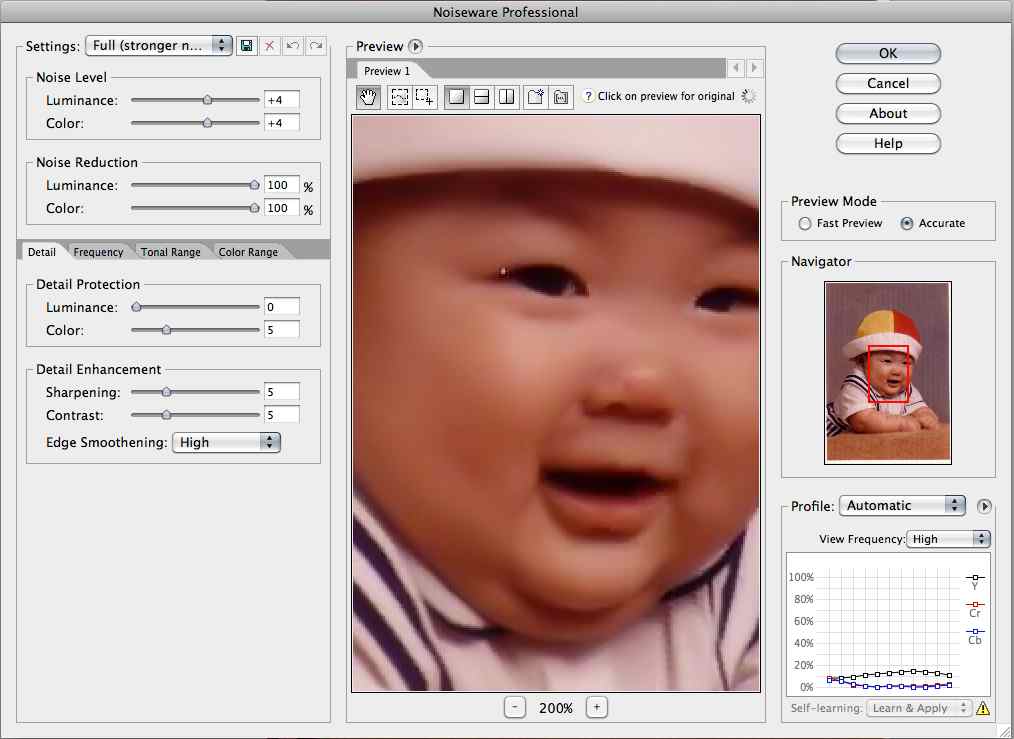
So, the cry went out for help. How did I remove the texture? Simple. Noiseware Professional.
I figured that the dots on the surface were the equivalent of “noise” — big noise, but noise nonetheless.
I didn’t use any custom settings. I just opened Noiseware used the “Full”, setting, pushed “OK” and, voila, the noise was gone.
So, now we had a nice, 2×3, noise free image.
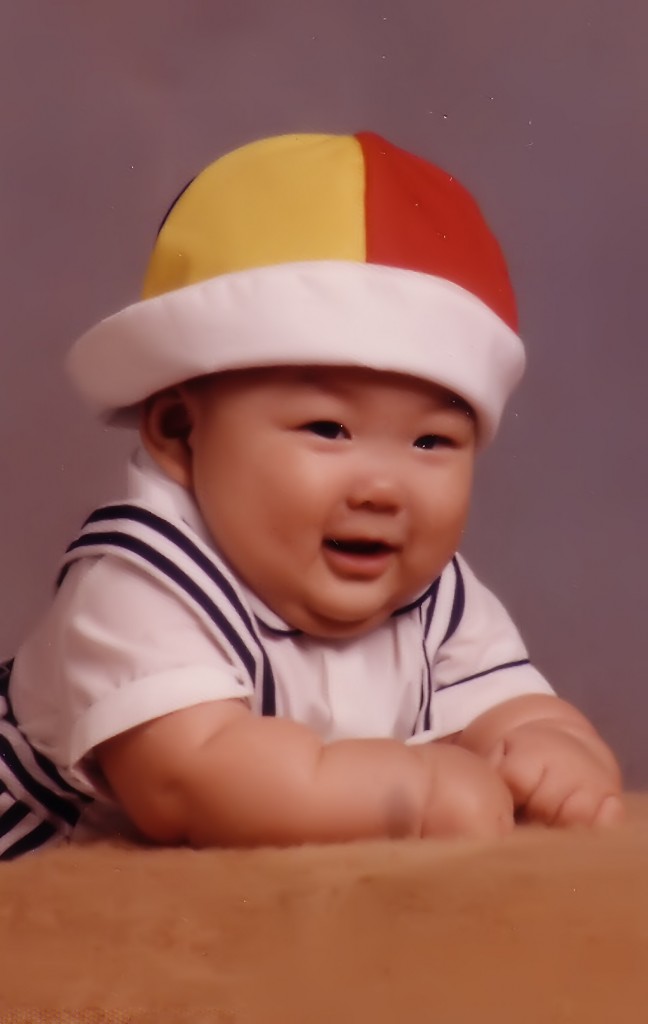
To make it easier for Jen to incorporate into the show, I used onOne’s Genuine Fractals to do a seamless enlargement. I doubled its size without distortion.
And, here’s the final version:
Bottom Line: I’m not one who would use a hammer or a pair of pliers instead of a wrench. But, once I realized that the texture in the scan had all of the characteristics of “noise”, using Noiseware Professional was an easy tool choice.
And, yes, I know that there are little white specs all over the image that will need to be cloned or healed out. Like feeding herself, that’s Jen’s job. Now that she’s 18 and “grown up” my job starts when she asks for help and ends when she can do it for herself. When she asks, I love every moment I get to work with her.
One Last Thought: This image was taken by Chris’ parents. They owned the copyright. They, and Chris asked Jen to use the photo in her slide show. I asked, and received, their permission to write this article and use this photo.
My family has a lot of old images taken by my parents and other family members that were printed on textured paper; so were images I shot, years ago. This article is written for those of us who either own the copyright to images printed on textured paper or who have clients who own the copyright to images printed on textured paper — who want to clean them up or reproduce them in a legal way.
As photographers, we expect people to honor our copyrights and we should do the same. No technique should be used on an image we are not entitled, by law, to modify.
(Copyright: PrairieFire Productions/Stephen J. Herzberg — 2010)





I have an Epson 4990 scanner. In the Professional Mode I click on the “Descreening” option. This removes most of the texture.